Back in the early days of the awfulness somewhere in early 2020, we put the pennies down for a Prusa Mini and waited.
Why the Mini? Space. Back in our previous house we really didn’t have a lot of space, and the Mini was a nice size
that could live on a bit of worktop in my office. It arrived in June, assembly was surprisingly straightforward and
then we started learning.
It’s been quite a journey. We moved house, and cradled the printer as we brought it to the new home. We set it up in the garage, and had an awful winter with it, before realising that operating temperatures and humidity really were a thing, so now it lives in the house in the second bedroom until the garage work is finished.
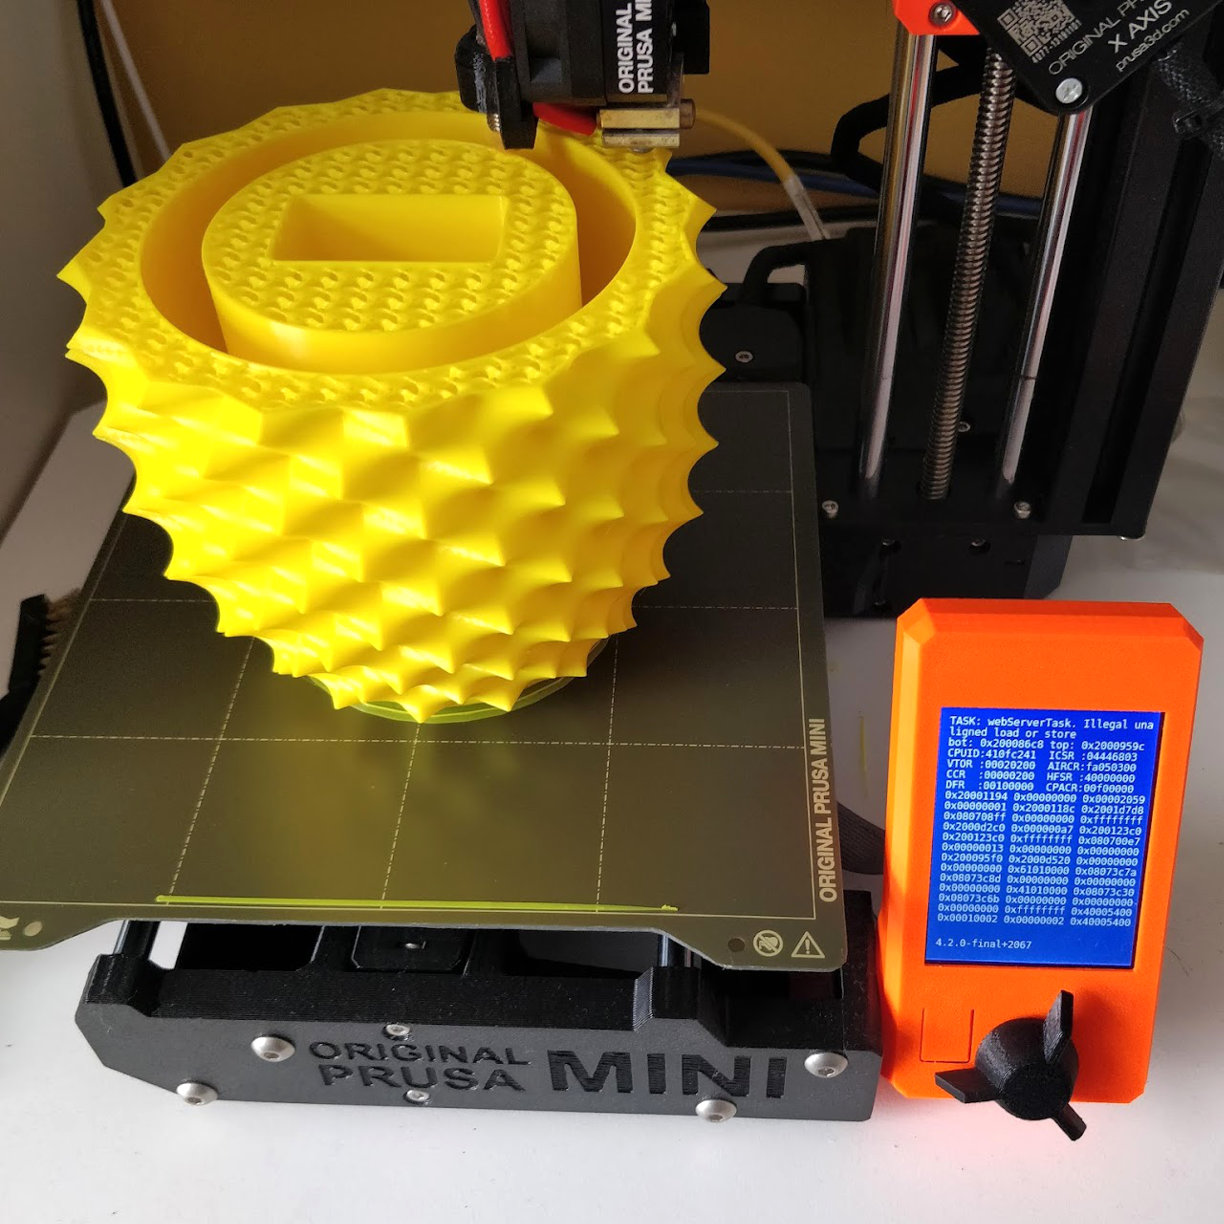
It’s printed quite a bit of filament. Mostly PLA, a bit of PETG, and a few exotic filaments as the need arises. It’s by no mean an industrial workhorse, but there are weeks when it’s printing almost constantly.
I’m also reminded that despite the fact that it’s from a big commercial name (at least in 3D printers), it’s a very open platform.
I had a nosey this weekend around a few printers donated to the local hackspace, and had forgotten what closed printers looked like - these printers
were so proprietary they required vendor sourced filament cartridges, a whole platform fighting against you rather than with
you, against the very ethos 3D printers are supposed to promote.
Our first generation Mini has been good. I realise it hasn’t been a flawless experience for everyone, and we’ve had the privilege of being able to upgrade a few parts as we we’ve gone along. It also looks a bit different from when it arrived through the door - it’s had a bit of work done. These are the changes we’ve done so far along the way.
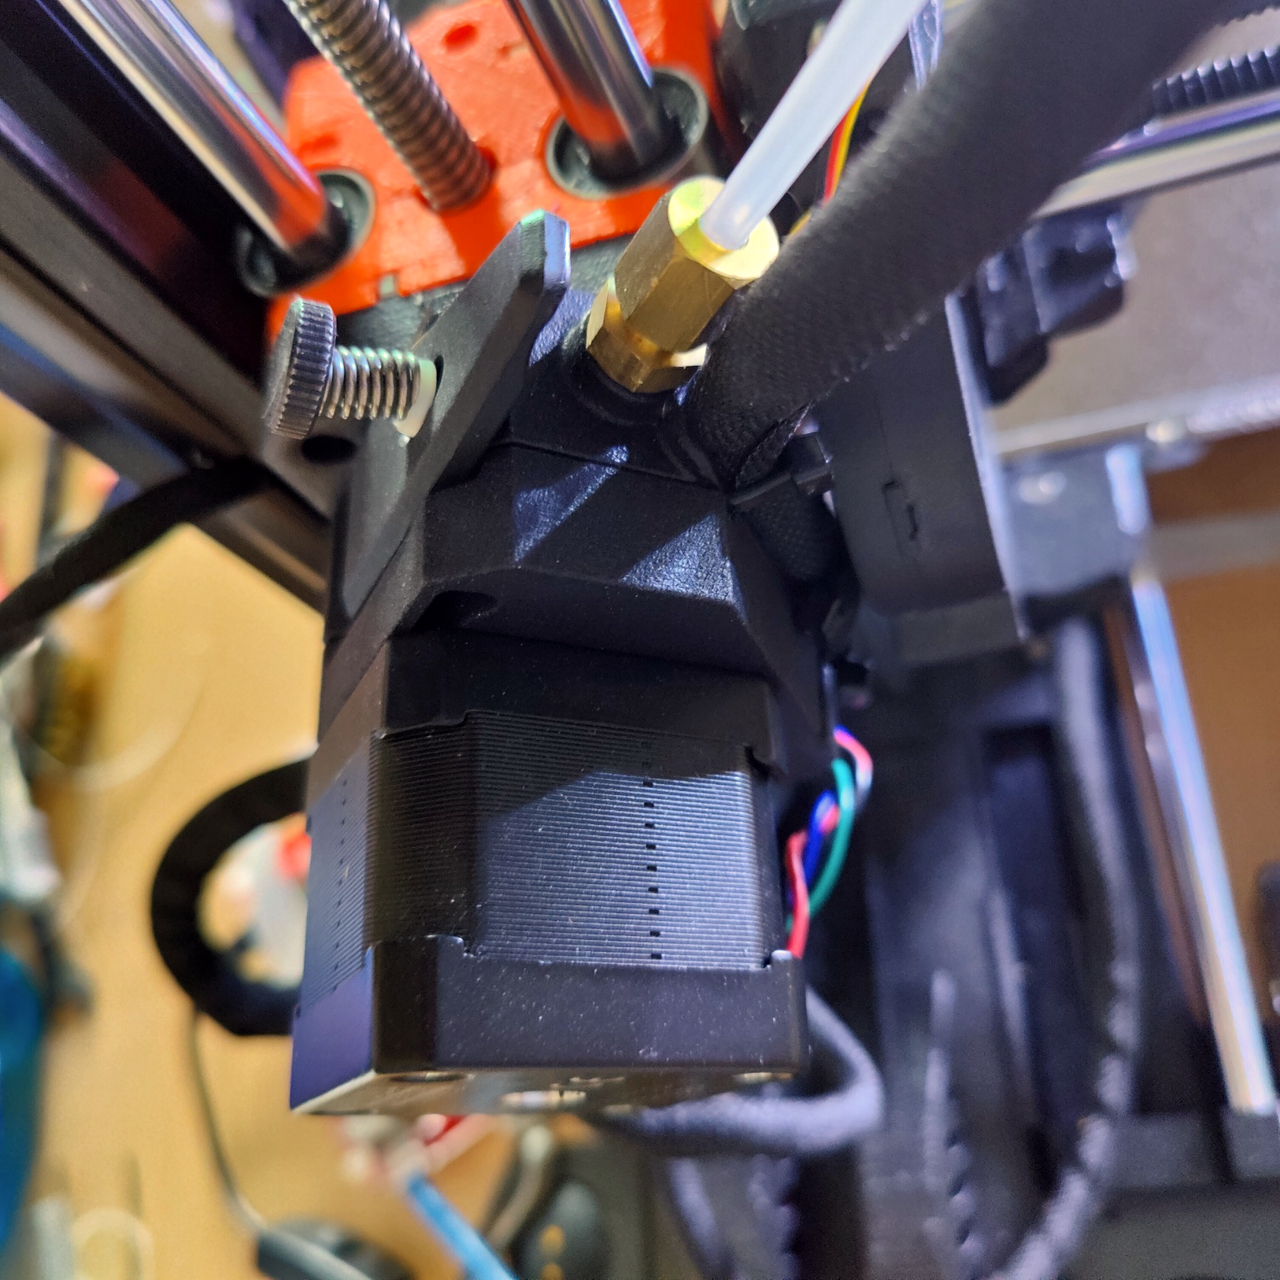
Bondtech Heatbreak and Extruder
So - Prusa may have cheaped out a bit on some parts of the Prusa Mini. The extruder is a single drive Bowden, and while adequate, occasionally struggles with different materials and does sometimes slip. The Bondtech Dual Drive extruder is a drop in dual drive replacement that takes around an hour to install and calibrate. It’s not a “wow” upgrade, but it reduces errors, and that’s a huge help.
The Bondtech Heat-break is designed to solve a problem of the early Prusa Minis with heat creep. I’ll be honest - I’ve not seen much of a visible benefit here, but since I was already taking half a printer apart, I took the opportunity to make the replacement.
Documentation from Bondtech is excellent with step by step guides, you’ll need a few tools, but it’s a very straightforward set of upgrades.
SuperPINDA probe
The original Prusa Mini shipped with the MINDA probe for bed levelling. The MINDA was a cut price version of the probe originally included with the i3. Unfortunately, it suffered a series of problems, some of them relating to changes in values with temperate changes. Prusa released a new version of the probe, the SuperPINDA that addressed these issues, along with a kit to upgrade the Mini’s MINDA probe to SuperPINDA.
Prusa’s own documentation is excellent - again with step-by-step guides, and it’s another straightforward set of changes. Boring, but pretty necessary.
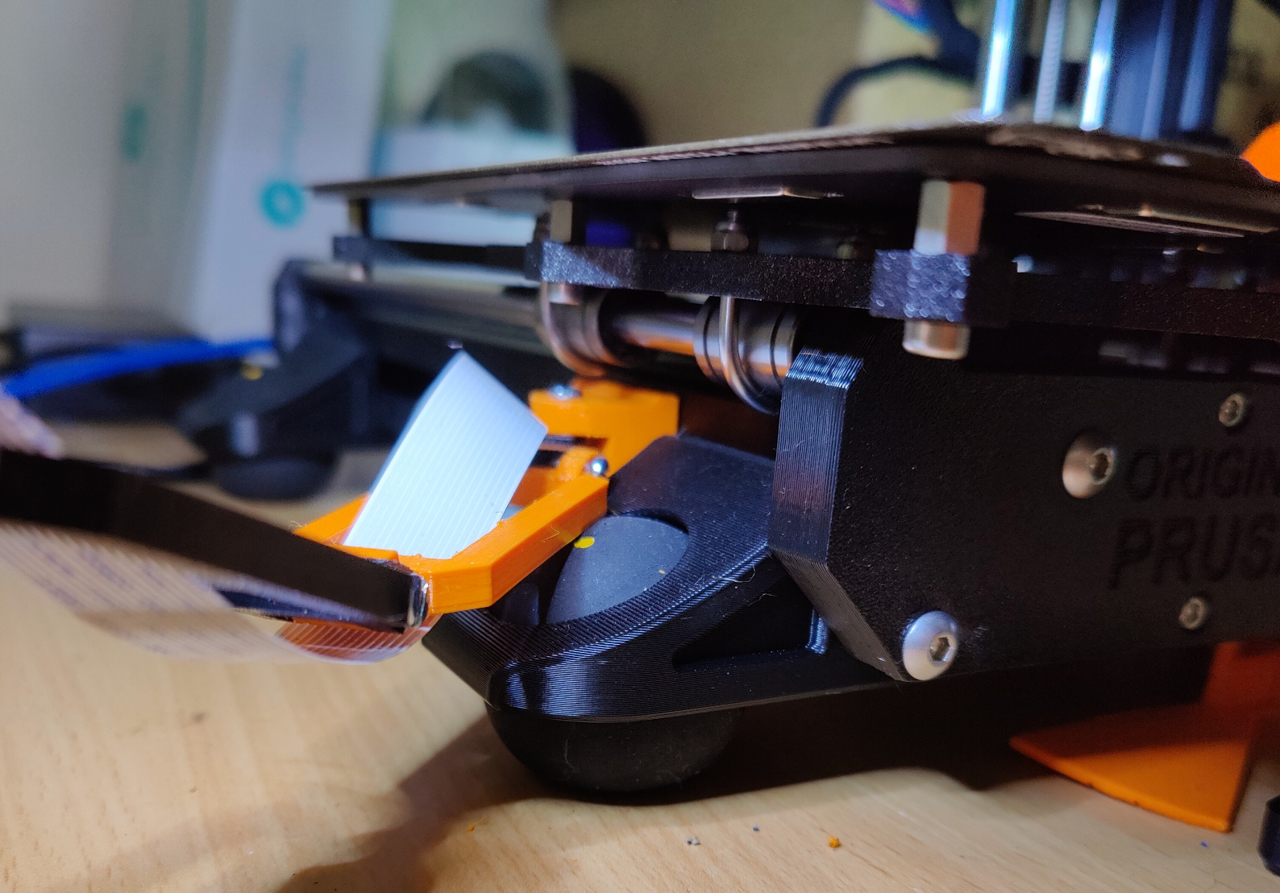
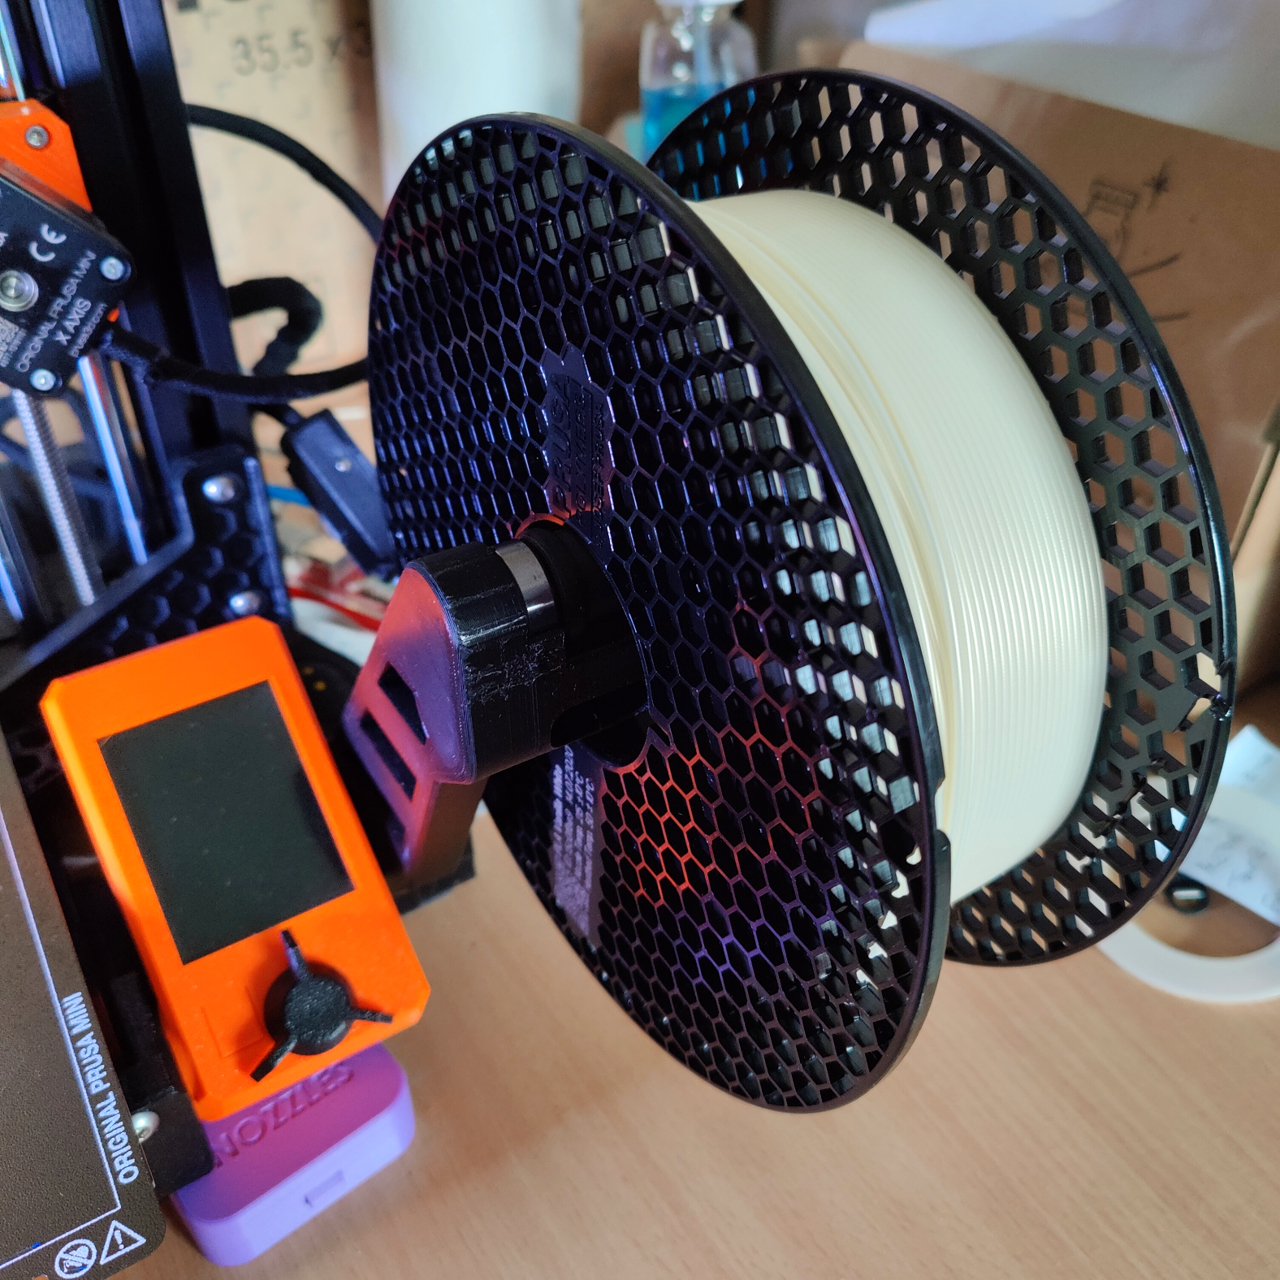
Prusa Mini Squash Ball Feet System And Spool Holder
I’ve heard the Mini described as quiet. Quiet compared to other printers, yes, but it’s still a 3D printer, and prone to vibrating whatever surface it’s on. This squash ball feet system is a neat little set of stands for the printer that absorbs the vibrations through regular double dot squash balls. I’m not super convinced by the spool holder, I think I may be going back to a separate spool holder, it seems to introduce more vibration to the system.
Print time is quite long, but it’s a good way of using up a lump of PETG and some spare parts. Ashamedly since we’ve recently moved house, we had just thrown away all my old squash balls, so had to buy new balls for this project.
OctoPi & OctoPrint
Well, these have been utter game changers. When we first set up the printer it was physically behind me, so keeping an eye on it, was trivial. It’s now up a flight of stairs and I broke my hip in March, so running up and down the stairs to eyeball the printer has been less than fun.
We have a lot of spare Pis around the house. I grabbed a Pi 2, and around an hour later, we had a working OctoPrint setup.
I also had two spare first generation Raspberry Pi cameras after running a few events, and was pleasantly surprised that it took no effort to set up
webcam monitoring. I now set-up files to print and watch my printer printing from anywhere in the house. So nice.
If you’ve got spare Pis around the house, it’s a good excuse to use up spare older hardware. The Pi2 I have running looks to be doing just fine for now, with wired ethernet. If we switch to wireless, we may use a Pi3. OctoPrint supports almost any old webcam, you almost owe it to yourself to have a camera feed.
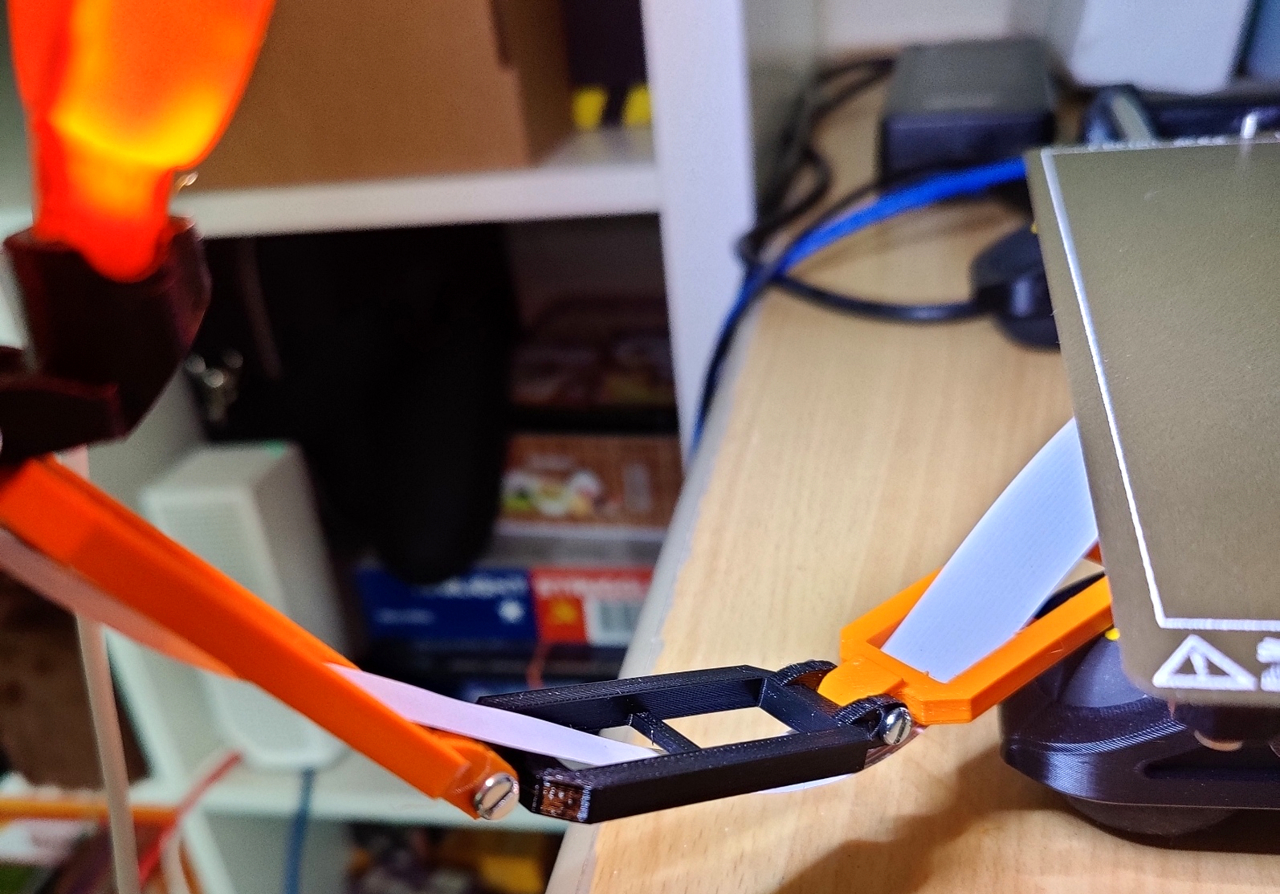
Prusa Mini Raspberry Pi Camera Mount
I needed a way to mount my Pi camera to my printer. I like a nice and tidy solution. This little ladder arm clips to side rail and allows for flexible positioning. By removing the glue around the focus ring, the Pi camera focus can be adjusted to a shorter distance.
It works great, it just needs some light…
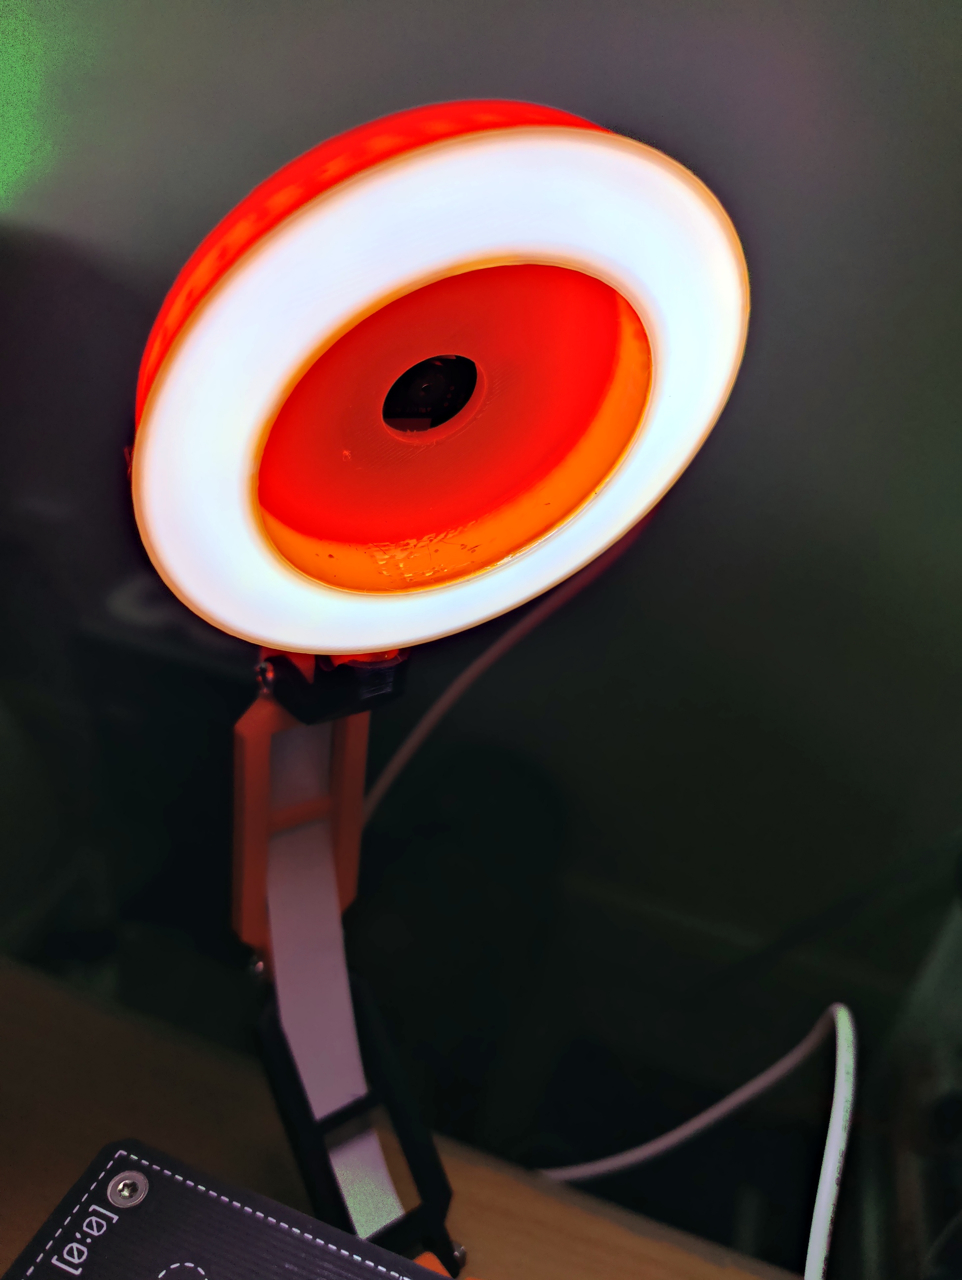
Ring Light for Prusa Mini Raspberry Pi Camera Mount
… so I picked up this Adafruit 5V 70mm ring light from PiHut,
and designed a ring light to mount to the top of the Raspberry Pi camera mount above. The camera mounts to the back using the
mount from the above kit, and a diffuser is included if you want to use it. After experimenting, I find the light better without.
This gives a nice light for streaming and stills.
 There are no ads on this blog and as far as I can remember, never have been.