The Dark Room is the property of John Robertson. This is a fan project, and a good excuse to build some hardware. John Robertson has in no way endorsed this project, or been approached for rights use. All rights to the Dark Room remain with John Robertson. Now that bit of obligatory it out of the way…
We’re big fans of John Robertson’s The Dark Room. For those not familiar, here’s the trailer.
The dark room is a live stage comedy show where members of the audience are invited to play an on-screen adventure game with multiple options. If they succeed, they win money. If they don’t, they die. Over lockdown, John took the show online and started presenting on Twitch. People follow along chanting the words, wear shirts, and draw art. It looks suspiciously not like a cult 👀. There’s also a computer game if you need a home dose of sadism.
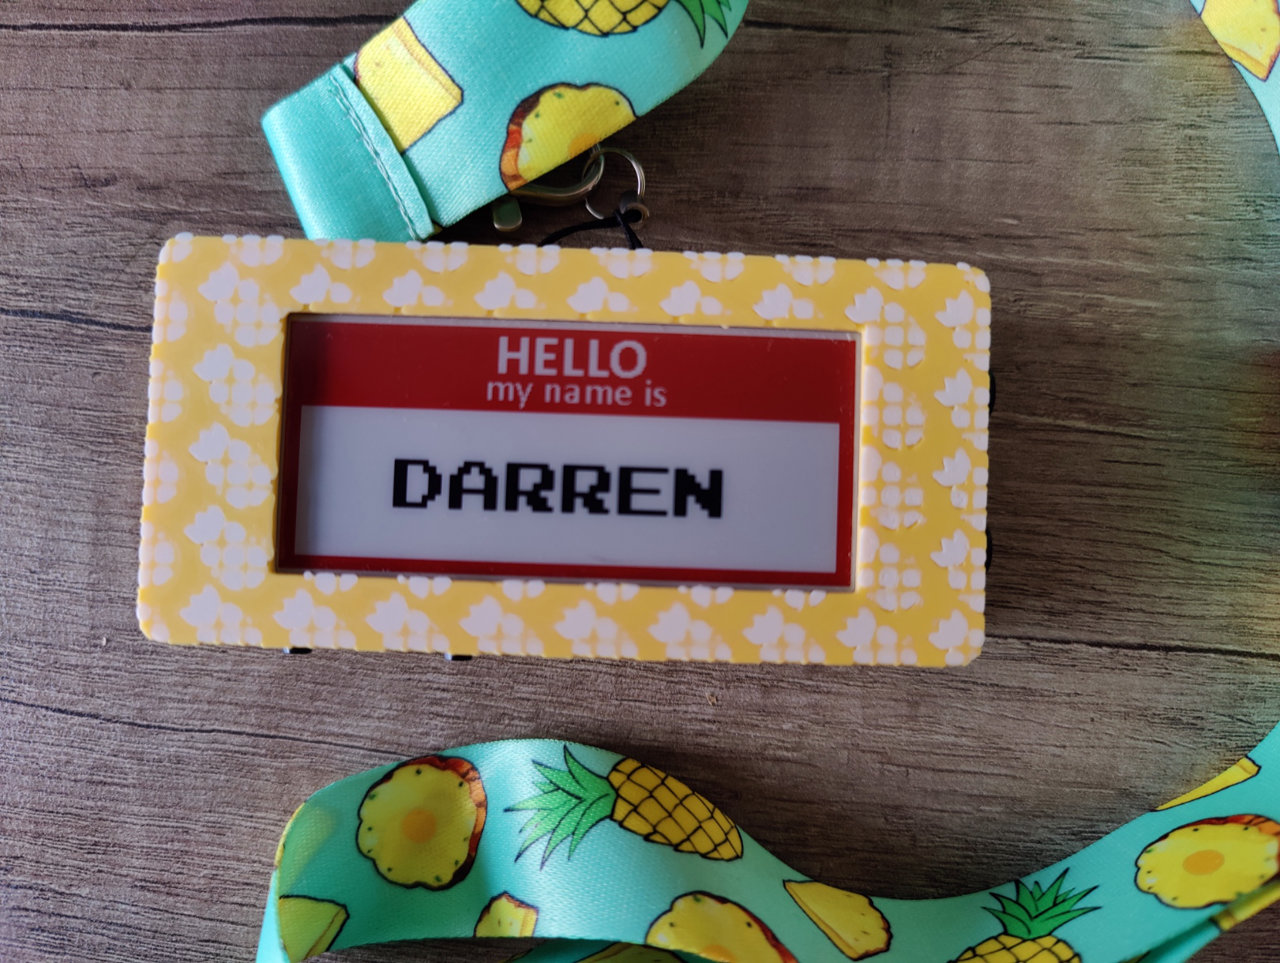
At a Manchester gig last year, one of the online moderators, invited us to wear “Hello, my name is” badges so we could work out who we all were, beyond Darren. It was a good gig, many death, much flamboyant potato.
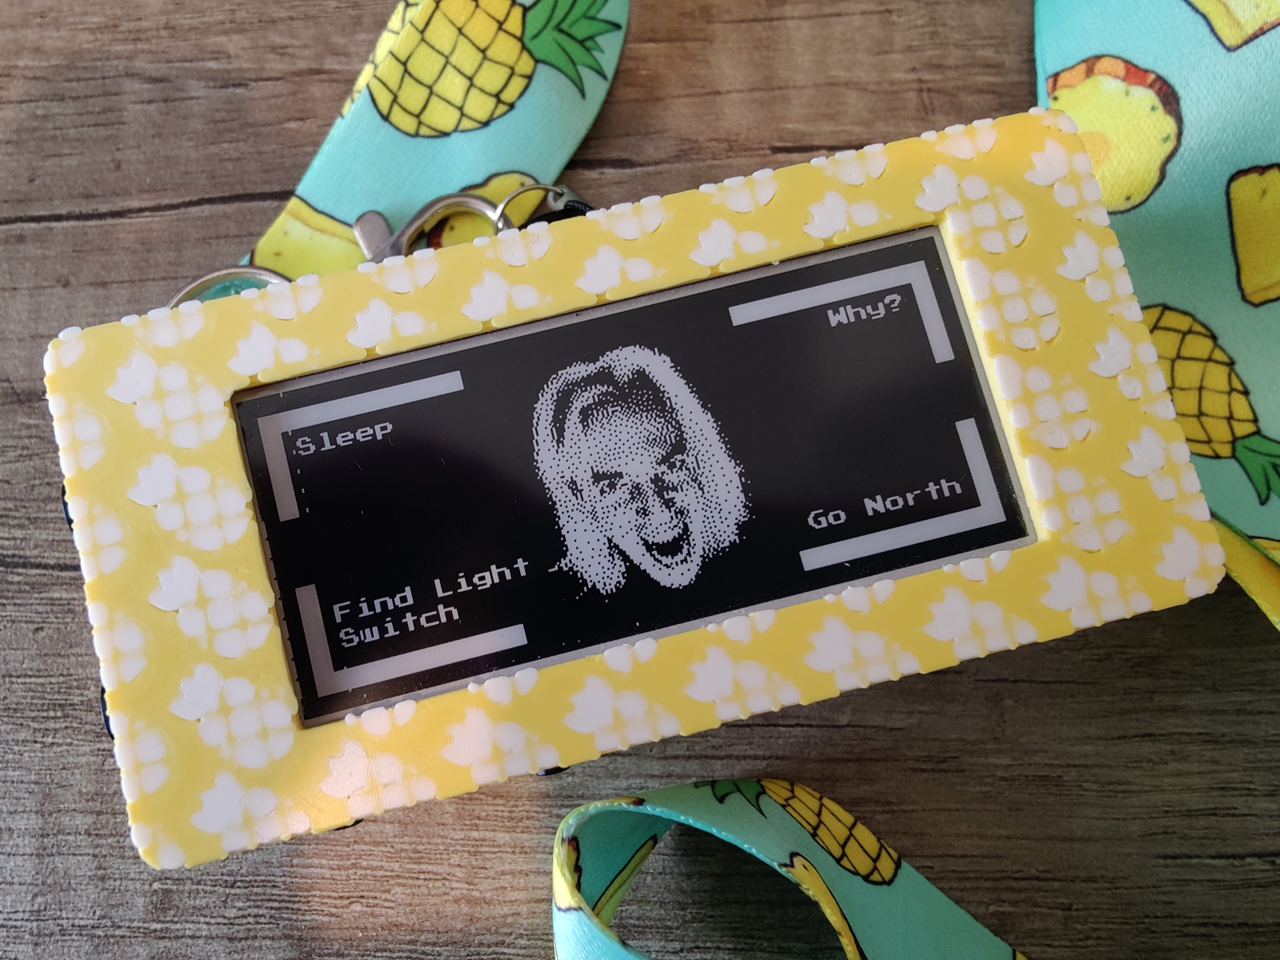
Back at home, I had acquired a Waveshare Red/Black E-Ink screen to use with a Raspberry Pi Pico, and had some vague ideas of turning it into a conference name badge (great minds think alike - this was before Pimoroni released the Badger). The dark room game is straightforward - four options per screen. Four buttons. We can build that.
Building the hardware
The Waveshare EInk screen is a 2.9” EInk screen with board and headers to interface with a Raspberry Pi Pico over SPI. If we mate a Pico board in this configuration, then it will stand at over an inch tall before we add any other components, and that’s a bit too chunky to carry. I tried to source some appropriate low level headers, but in the end I ended up removing the headers and soldering the two boards directly to each other, reducing the height by half.
I want this to be a fully self contained little badge, that people can pick up and play with. I added a 2000mAh flat LiPo battery and a LiPo shim from Pimoroni. The shim can handle power and charging. Because it needs to sit on the underside of the Pico, I removed the JST header and attached wires to allow the board to sit flusher. Some kapton tape before soldering avoids accidental contact.
![]()
Big 12mm tact buttons provide the directions. Two small 6mm tacts provide power and reset.
Finally, a micro usb extension cable was carefully pulled apart from remove as much housing as possible to allow the micro port to be redirected to the bottom edge of the case.
Once we’ve done all that, we just have to stuff it in to a case.
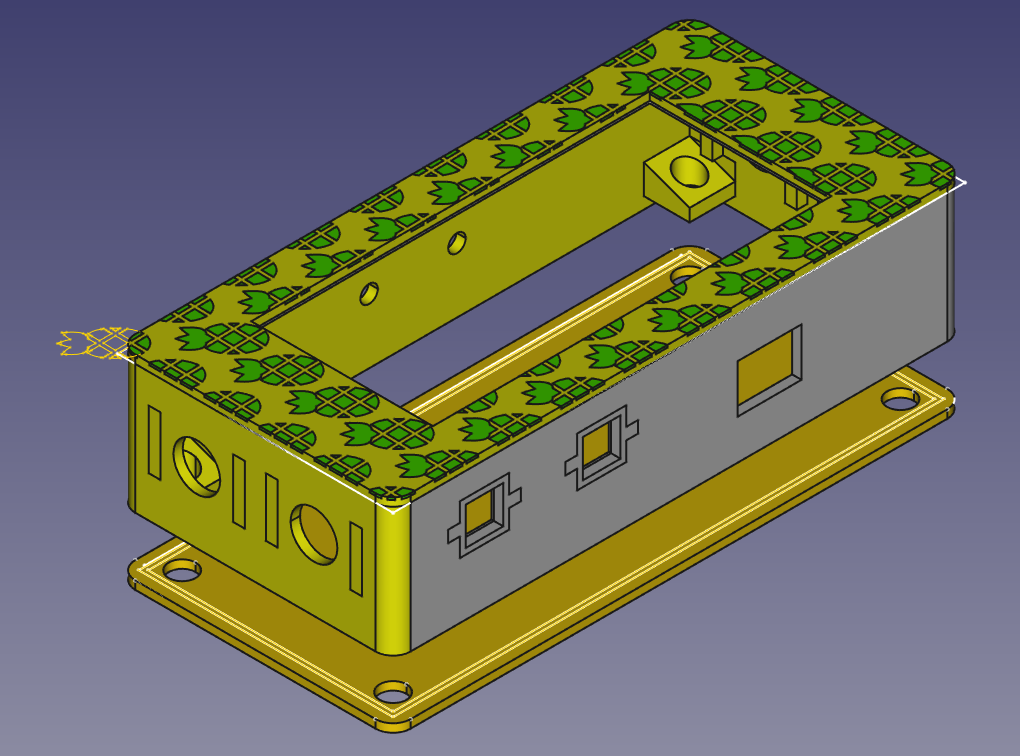
Designing a flamboyant case
I’ve switched over to using FreeCAD Link Daily for most of my 3D printing CAD. I’m finding pain points every so often while designing a project, but I’m still happy enough with this.
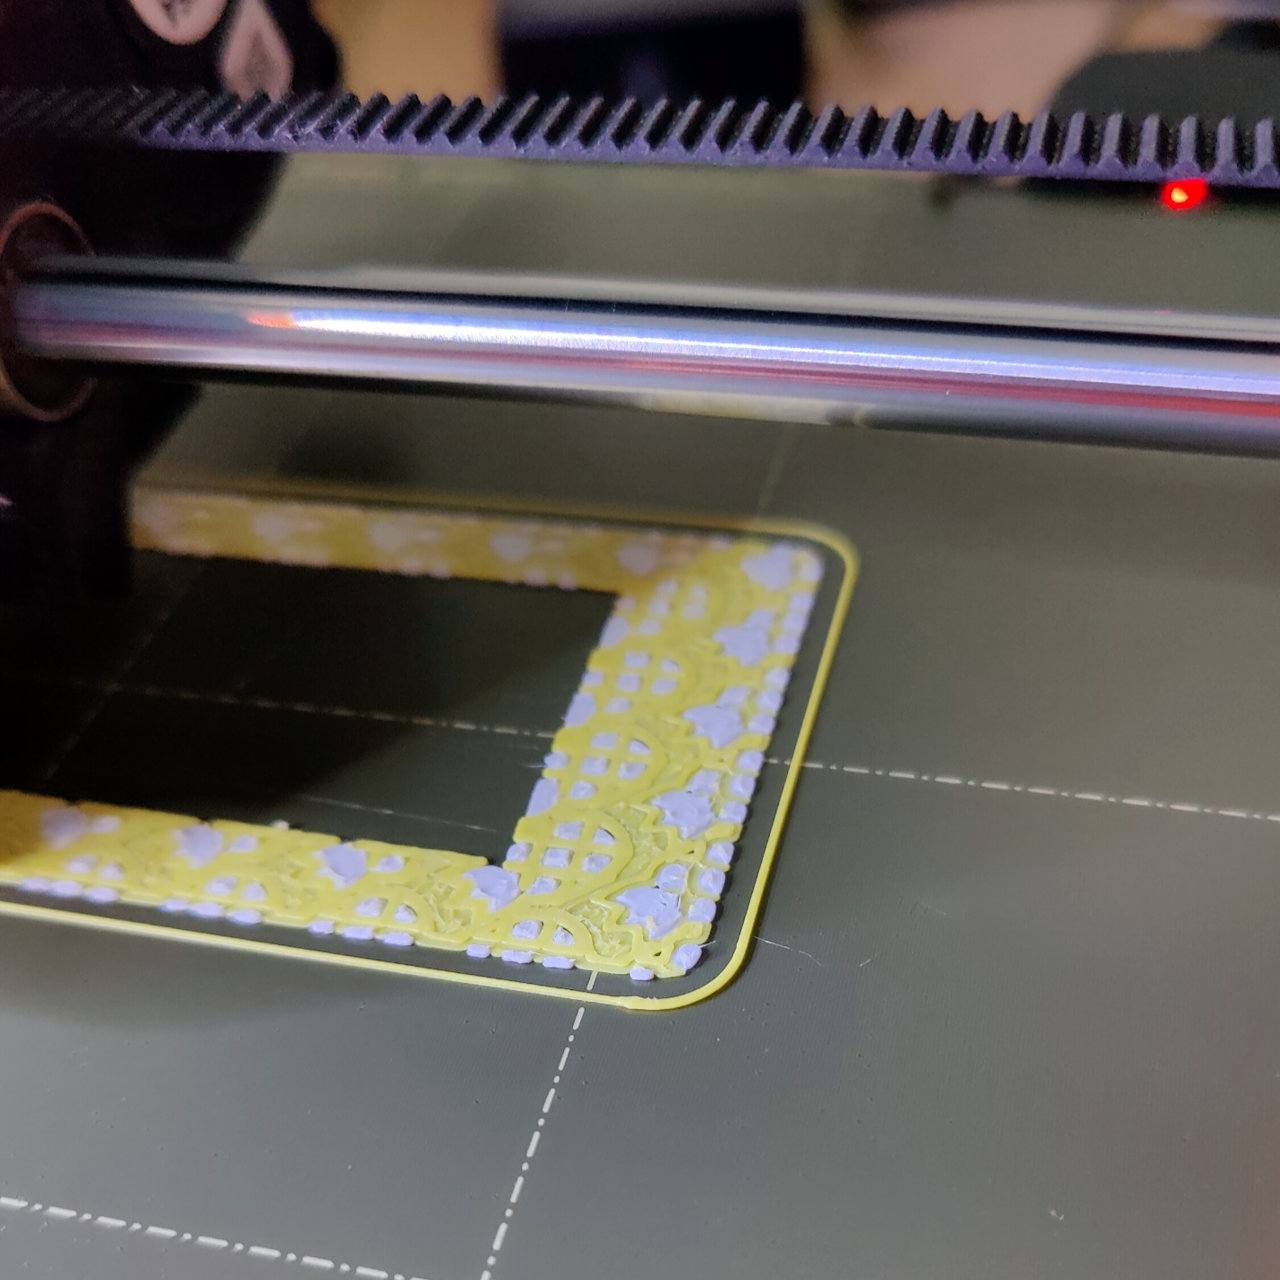
This project is pretty straight-forward: design a box, add some cut outs, and add a snazzy in laid design to the front from an SVG.
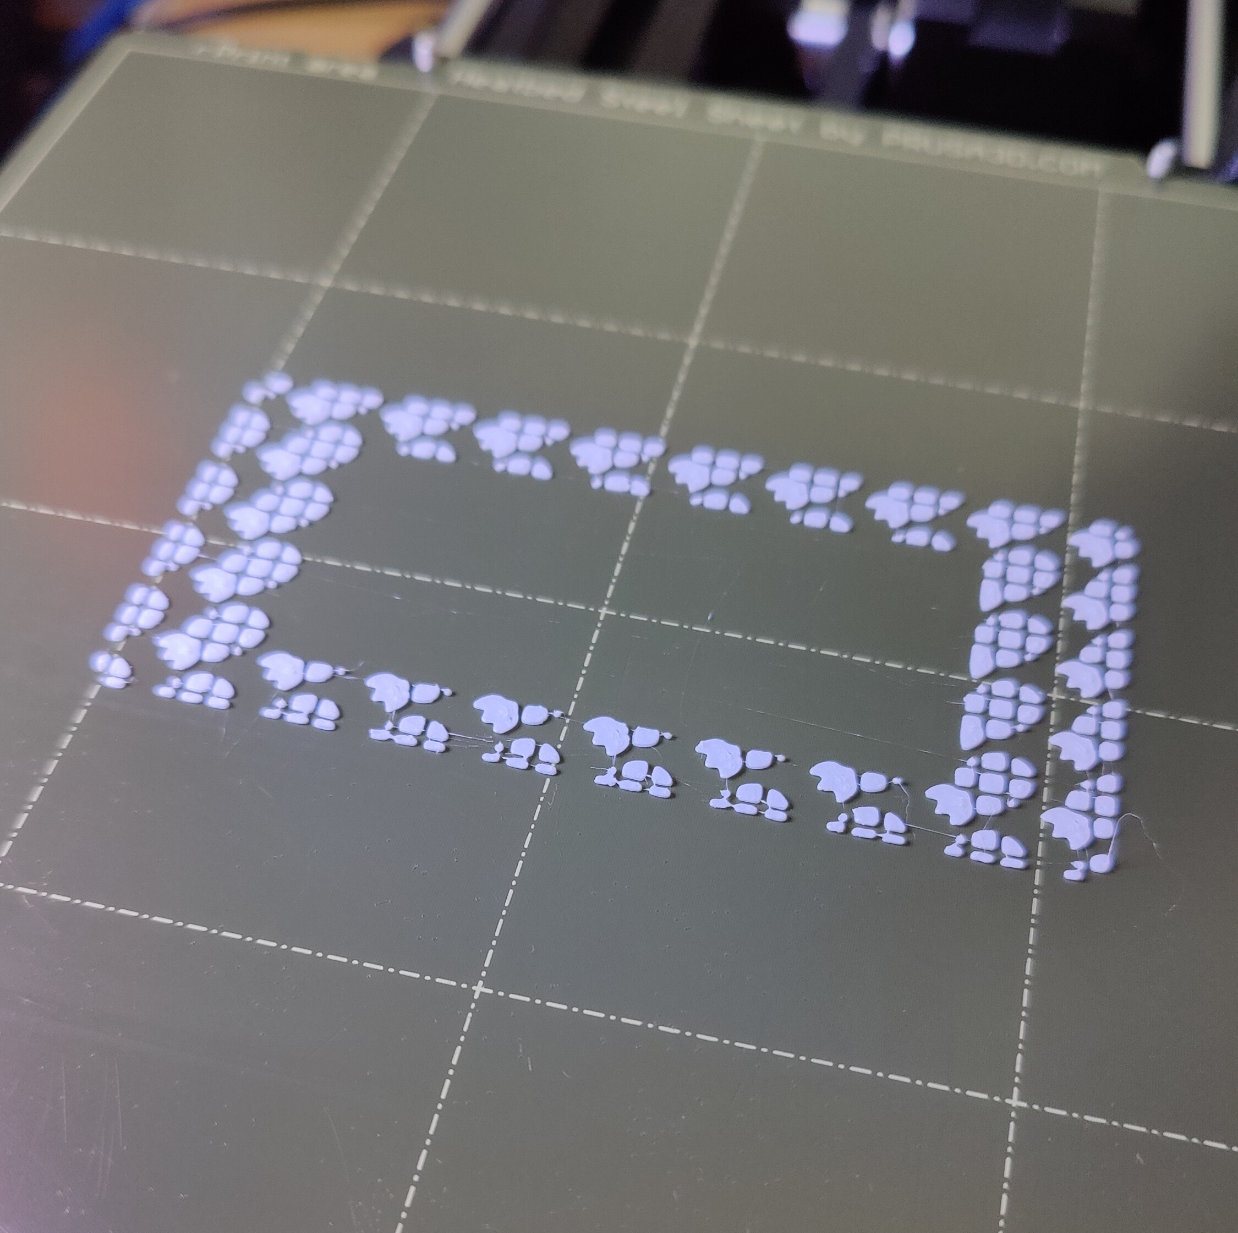
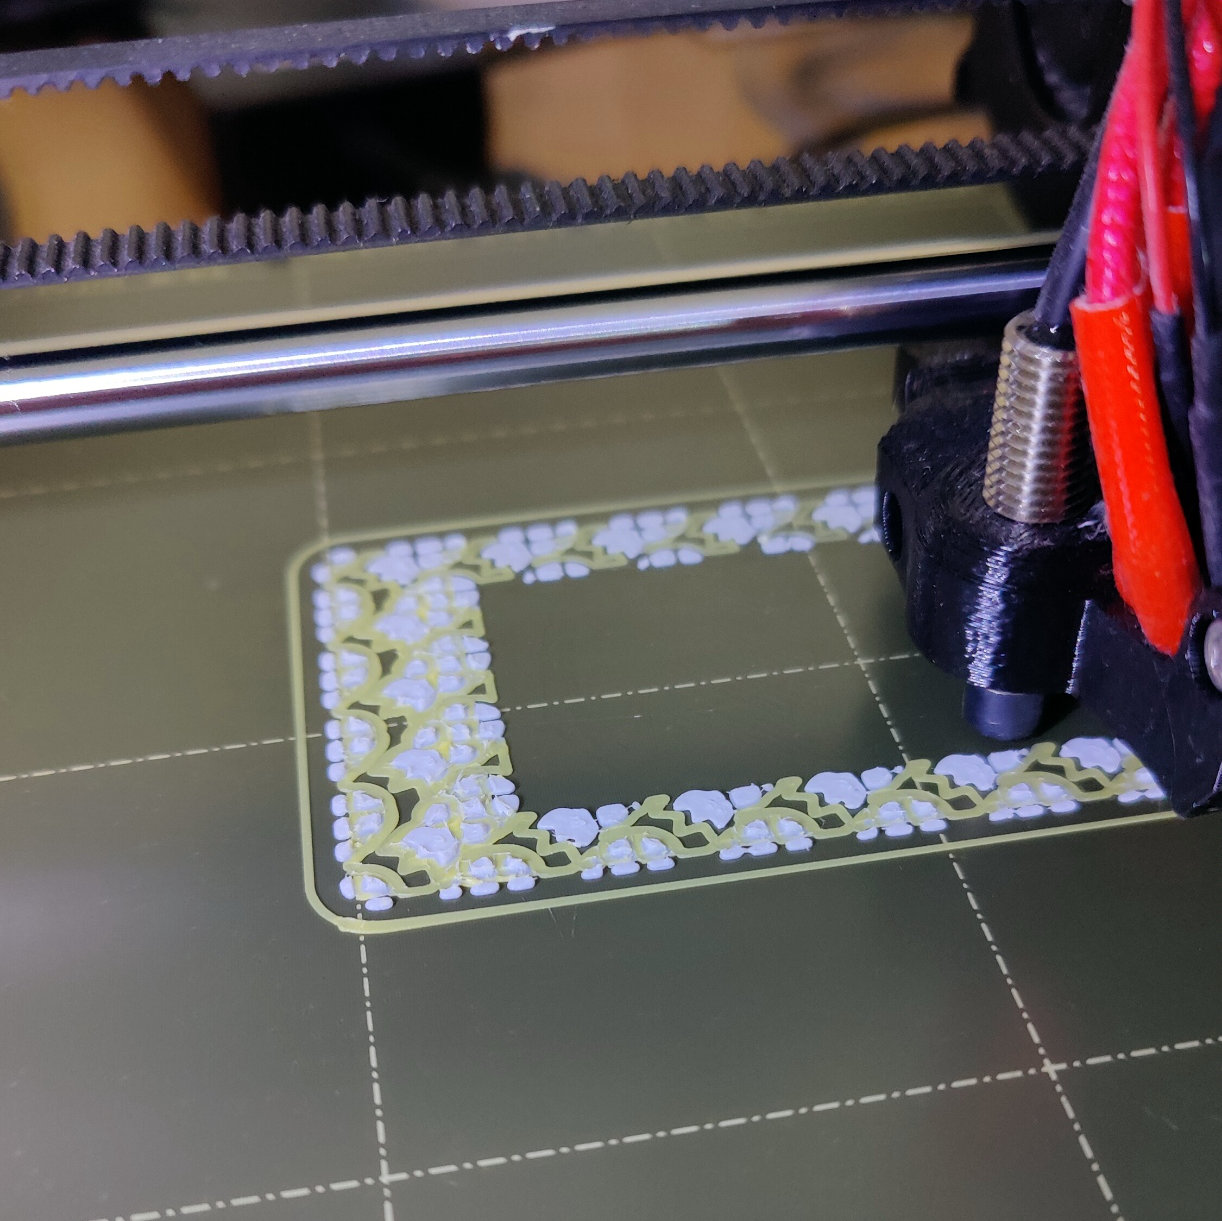
I think the front design nearly killed me. Importing the SVG once was fine, but FreeCAD makes little use of hardware acceleration, and it struggled with taking the outline of a flamboyant potato (pineapple), repeating it 5x9, and then both padding and cutting it. And once you had done it once, the only way to make changes to the underlying structure was to delete it, make your changes and then reapply it - or else the entire application would crash out.
This required a fair amount of patience. And tea.
Project was sliced in PrusaSlicer and then printed on a Prusa Mini. Inlay layers printed in PolyTerra PLA Cotton White, and then print the model using PolyTerra PLA Savannah Yellow. I love the texture of this PLA, and have been using it a lot for project housings. It feels fantastic.
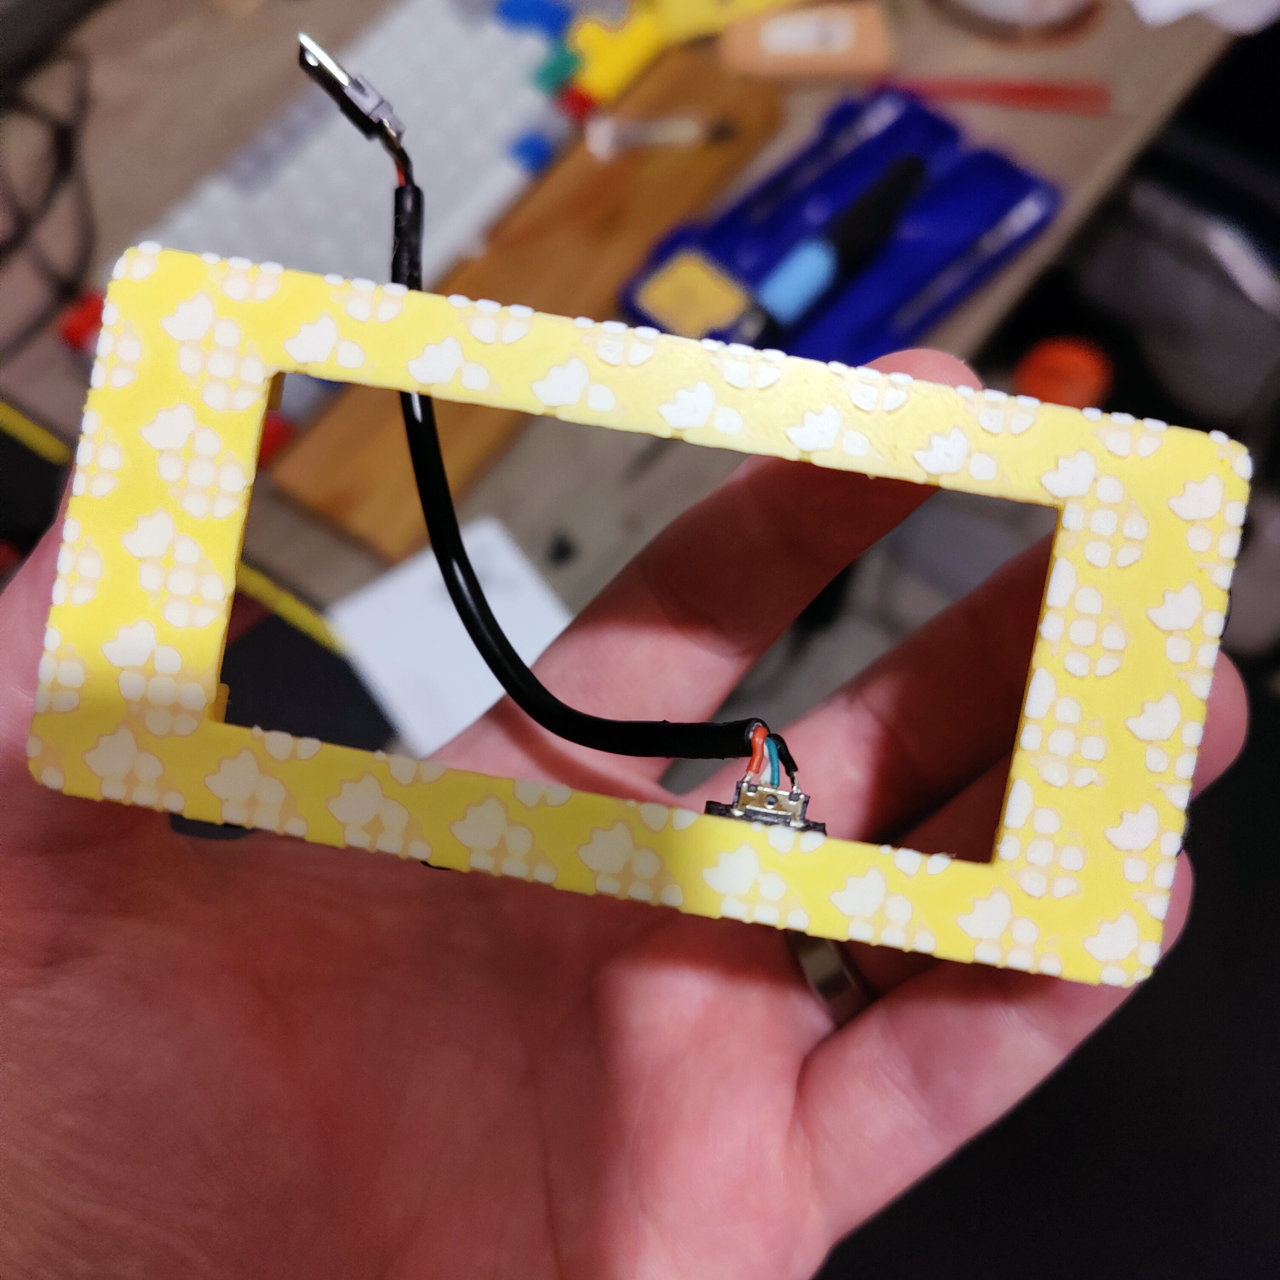
Four heat set corner nuts in M3 in the case are matched by 12mm M3 hex button nuts to close the back.
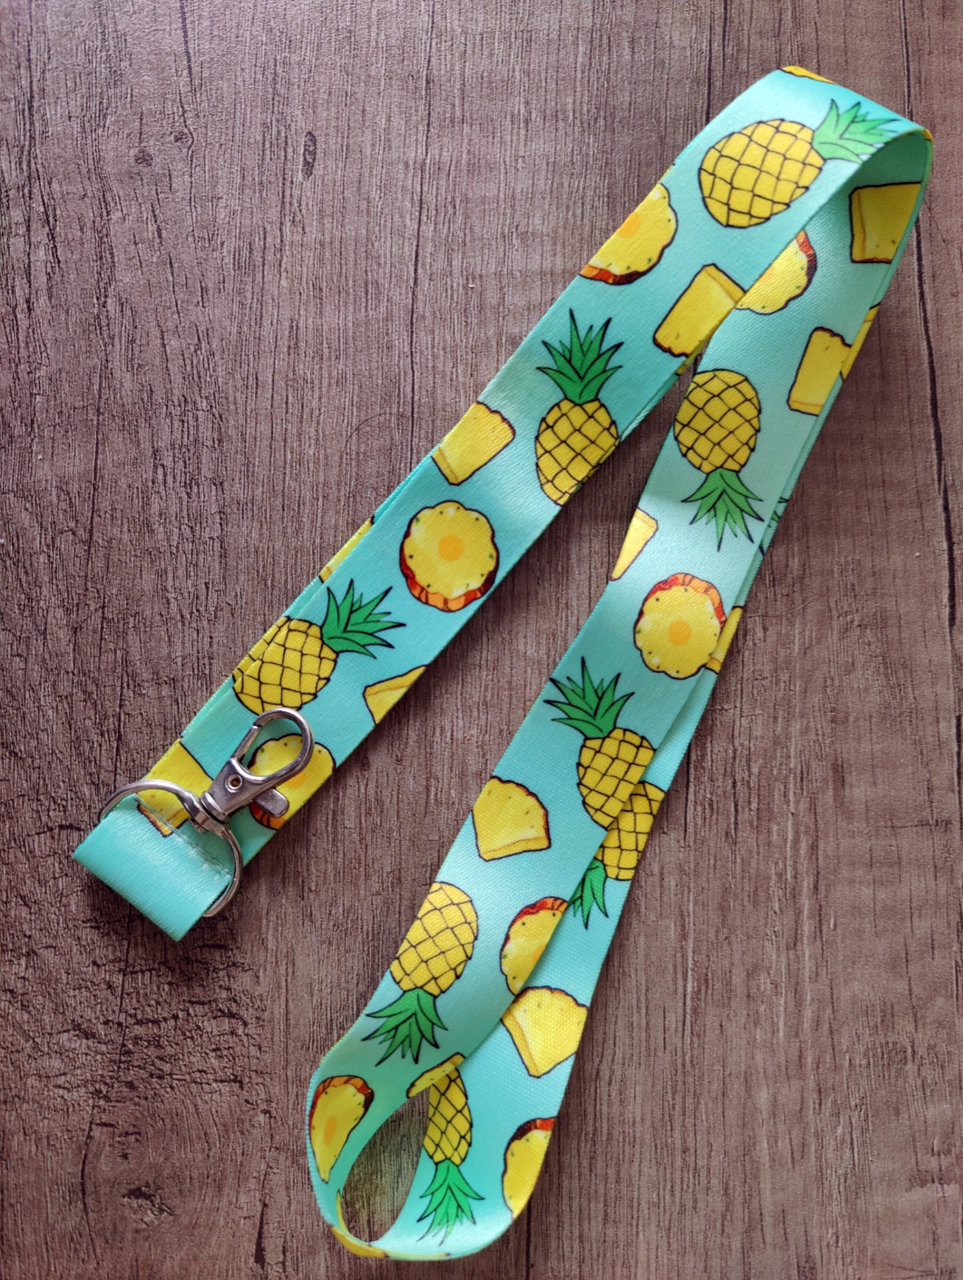
To finish the theme, I found a flamboyant lanyard.
Writing a Dark Room
I’ve built the software in MicroPython, it’s given me a nice quick build cycle. Since I’m currently using a Windows box, WSL1 and tmux gives me a nice split for jobs - Vim for editing, minicom for serial and a make script I can run that uses pyboard.py to push the files to the badge. It’s a nice feedback loop.
I’ll add my usual disclaimer that I’m my python is a bit fudgy at best. All code is provided for your own amusement.
I would usually share all of the source code for a project. However, this project contains information on game script that is not my property, and as such is not mine to share. I’ll share my approach to architecture, and tools I’ve used along the way.
The software is split in to three key scripts:
- main.py - A loop that switches between attract modes
- name_badge.py - An attract mode that displays a three colour name badge.
- game.py - The main game.
Keeping this separation makes debugging simple. If I need to focus on the game, I tell main.py to load the game directly, and we don’t worry about the attract mode and vice-versa. If I plan to add another module, I can just add the functionality in to main.
# Define main handler for passing between application functions.

from name_badge import main as name_main
from game import main as game_main

while True:
    name_main()
    game_main()
The attract mode displays a name badge. Press a button exits the method and starts the game method:
def main():
    init_gamescreen()
    write_name('DARREN')
    write_gamescreen(hello_border_buffer, draw_bg='red')

    while True:
      if (
        button_ne.value() == 0 or
           button_nw.value() == 0 or
           button_se.value() == 0 or
           button_sw.value() == 0):
           return;
The game uses a dictionary of rooms that’s kept in rooms.py, and a variable indicating the current room. Each room has a blurb and a set of exits, and looks like:
dark_room = {
  "home": Room(
      "You awake to find\n" +
      "yourself in a\n" +
      "dark room.",
      Exit("Why?", "why"),
      Exit("Go North", "mr_spike"),
      Exit("Find Light\nSwitch", "find_light_switch"),
      Exit("Sleep", "sleep_1")
  ),
  # ... lots more room entries
}
If we ask a room for a direction, we’ll get an Exit, and a pointer to the next room:
current = dark_room['home']
next = current.ne
print(next.exit_id) # why
current = dark_room[next.exit_id] # set current to next room id
This being the dark room, we do have a special kind of room, the one you don’t come back from.
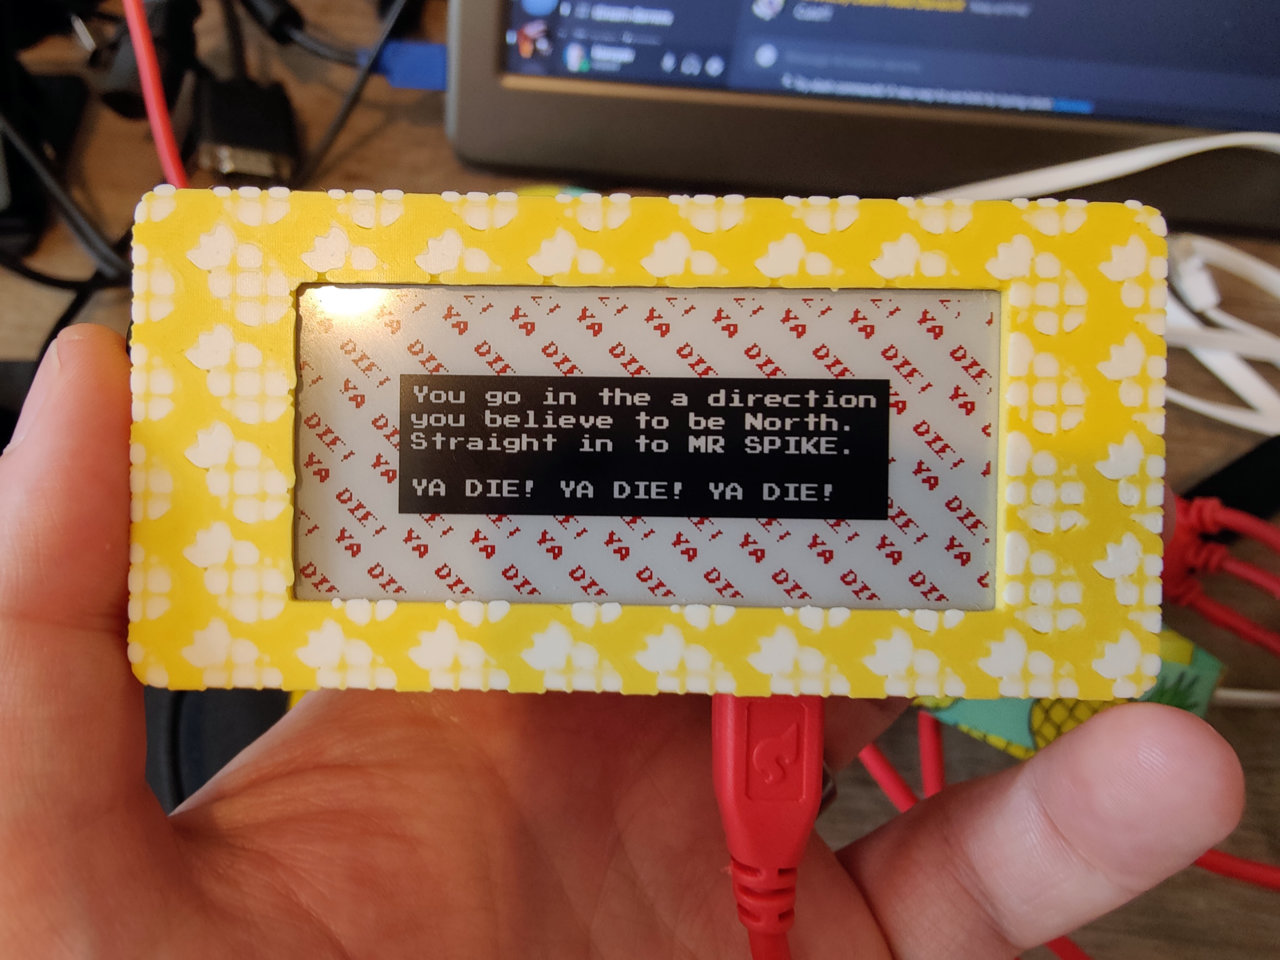
    "mr_spike": Die(
        "You go in the a direction\n" +
        "you believe to be North.\n" +
        "Straight in to MR SPIKE.",
    ),
We can then handle these as special exceptions in our game loop.
Our game loop is then no more complicated than moving from room to room, asking the player what they want to do next, and handling that decision. If the player dies, we exit this method, which returns us to our main and will bring us back to the attract mode.
def main():
    # Load dark room state
    i = "home"
    room = dark_room[i]

    while(isinstance(room, Room)):
        print(room.blurb)

        init_gamescreen('red')

        if room.blurb is not None:
            write_blurb(room.blurb)

        write_gamescreen(fb_room_blank, draw_bg=None)

        # Init room, draw state
        init_gamescreen('red')

        if room.ne is not None:
            write_lines(room.ne.label, Position.TOP_RIGHT)
        if room.nw is not None:
            write_lines(room.nw.label, Position.TOP_LEFT)
        if room.se is not None:
            write_lines(room.se.label, Position.BOTTOM_RIGHT)
        if room.sw is not None:
            write_lines(room.sw.label, Position.BOTTOM_LEFT)

        write_gamescreen(fb_room_blank, draw_bg='black')

        # Wait for input

        dir = None
        while dir is None or (getattr(room, dir) is None):
          if button_reset.value() == 0:
            return

          if button_ne.value() == 0:
            dir = 'ne'
          if button_nw.value() == 0:
            dir = 'nw'
          if button_se.value() == 0:
            dir = 'se'
          if button_sw.value() == 0:
            dir = 'sw'

        print(dir)

        next_id = getattr(room, dir).exit_id
        room = dark_room[next_id]

    if isinstance(room, Die):

        init_gamescreen('black')
        cut_dims = write_blurb(room.blurb + "\n\nYA DIE! YA DIE! YA DIE!", inverse=True)

        fb_red.fill_rect(cut_dims[0], cut_dims[1], cut_dims[2], cut_dims[3], white)

        write_gamescreen(fb_yadie, draw_bg='red')
Waveshare provide an excellent wiki which makes working with their EInk screens easier. Not easy. These 3 colour EInk screens perform full refreshes of both layers on each draw, which makes them incredibly slow, and a little painful when you’re trying to debug issues.
This project uses both graphics and fonts, and makes extensive uses of framebuffers to put them together. font_to_py.py handles the font conversion, which are then loaded as regular python files.
Graphics conversion needs a little more work:
- generate a 1 bit bmp in inverse colour (white in, black off)
- use imagemagick to convert the bmp to pbm.
convert file.bmp file.pbm - Use convert_pbm.py to generate a readable bytearray.
Put together, you’ve got an interactive dark room that run an attract mode in the form of a badge, and then on a button press, launches in to a game. You can also power down the device at any point and it’ll keep whatever is displayed on the screen, making it excellent for all day use.
 There are no ads on this blog and as far as I can remember, never have been.