This project had a simple premise - make a touch-controlled night-light.
Then it got a bit complicated.
The original plans were to build a control board and a daughter-board with an array of RGB leds. The control board was simple - AtTiny84, and capacitance sensors using copper tape and resistors. Three touch sensors, one per channel. The daughter board was a little more complicated, working the connections between the LEDs and avoiding any shorts. It took a while to get it together, and was a bugger to debug. And was quite big… And did I mention I spent a few years tinkering with it?

And then it shorted and blew.
sigh
So. Back to the drawing board.
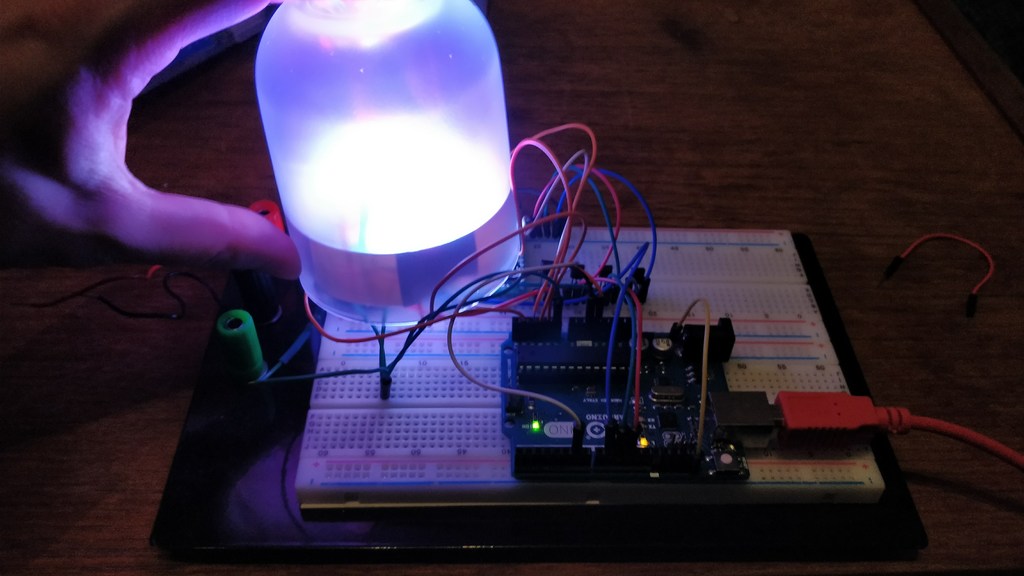
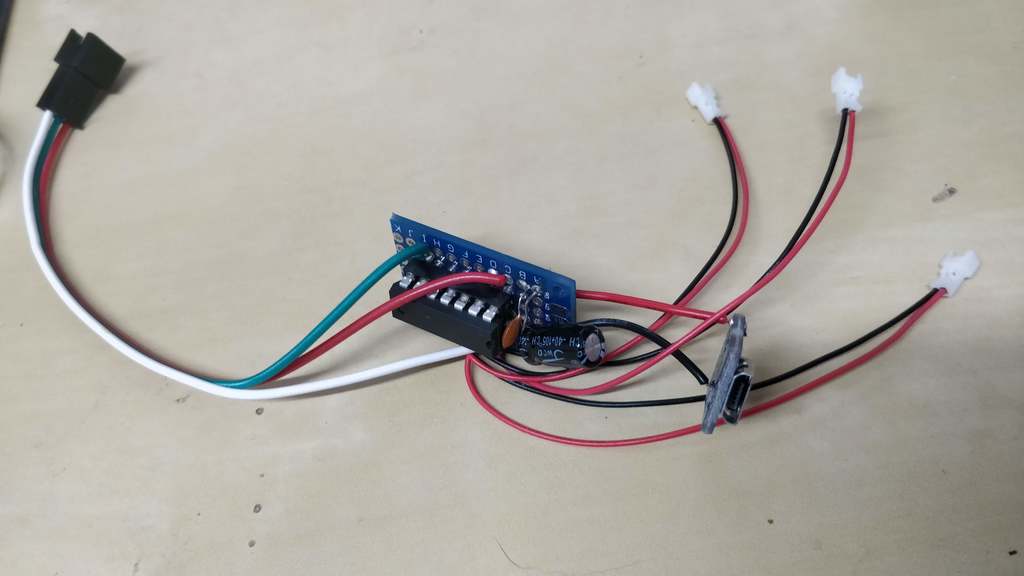
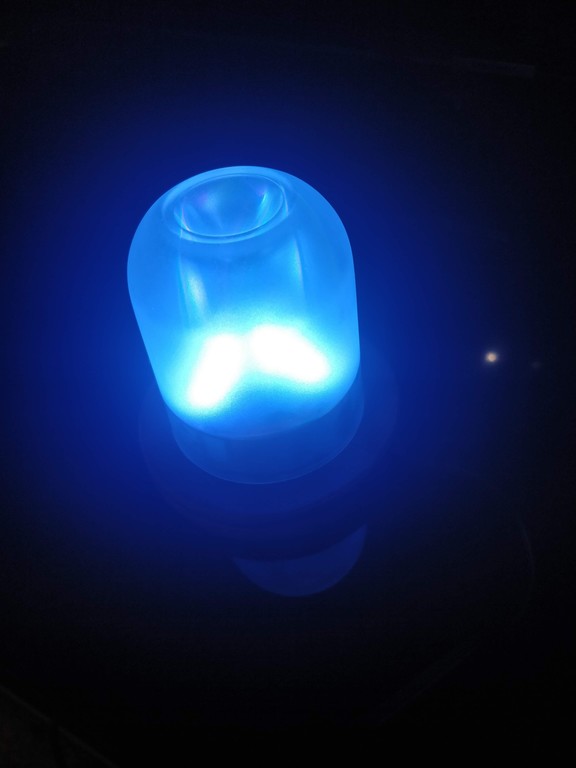
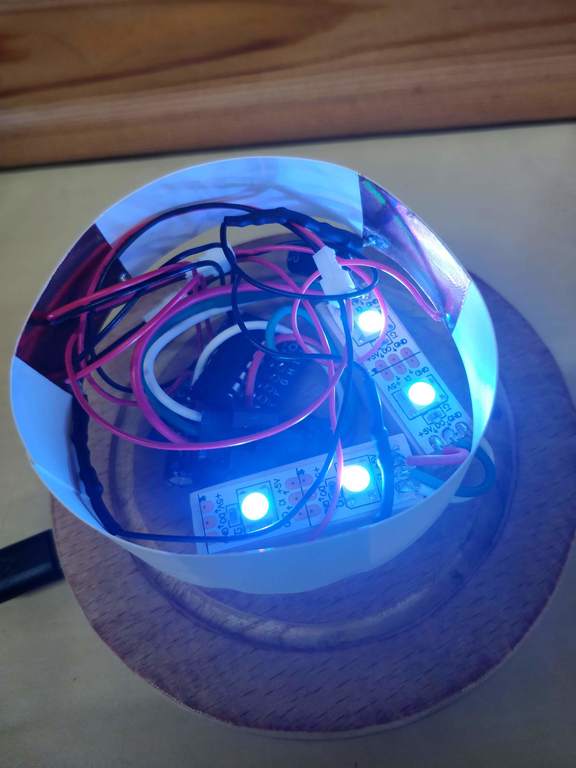
At this point, I just want to get the job done. My goals had changed a bit, so time to make the project simpler. I had some scraps of WS2812s left around from a few other projects. Rather than manage lots of discrete connections, I now only need to worry about power, ground and control. This reduces size and complexity. I redesigned the board, built all the connections around JSTs and threw the electronics together in a couple of sessions.
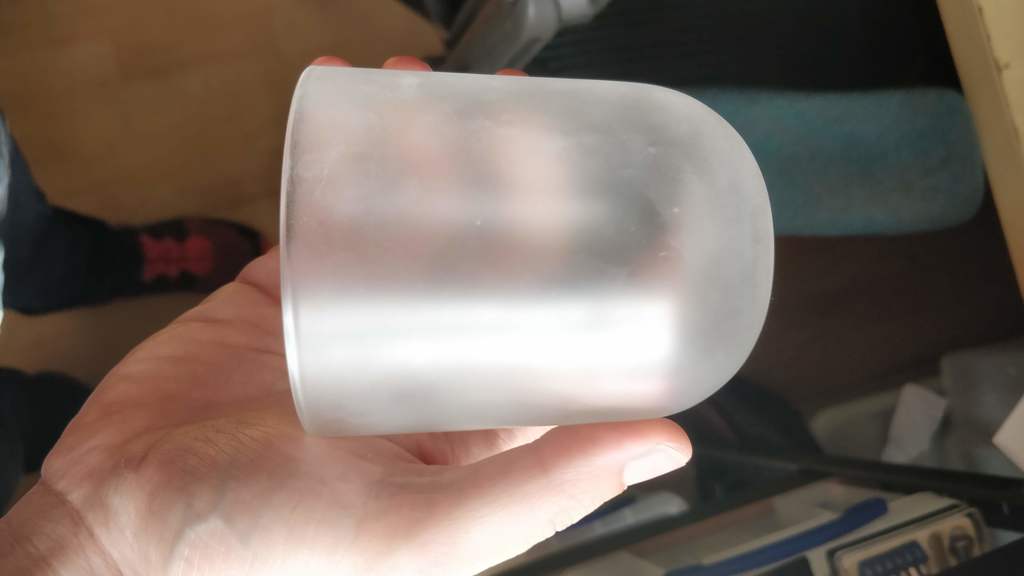
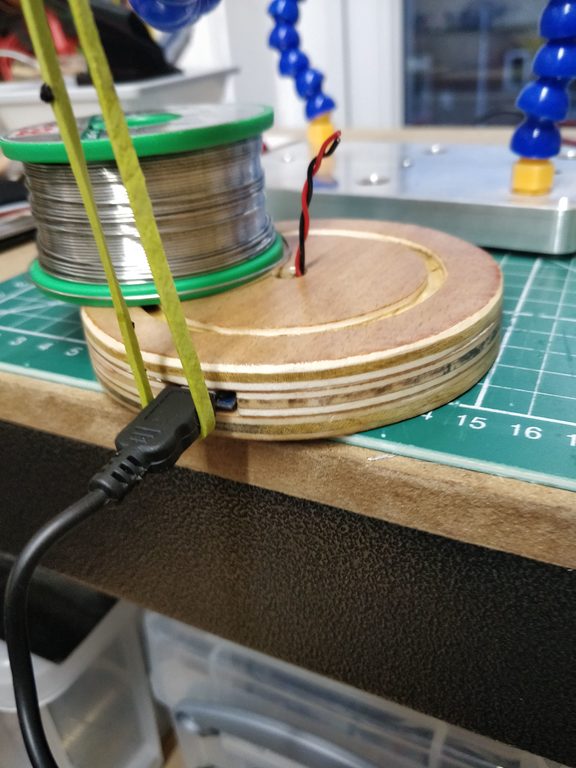
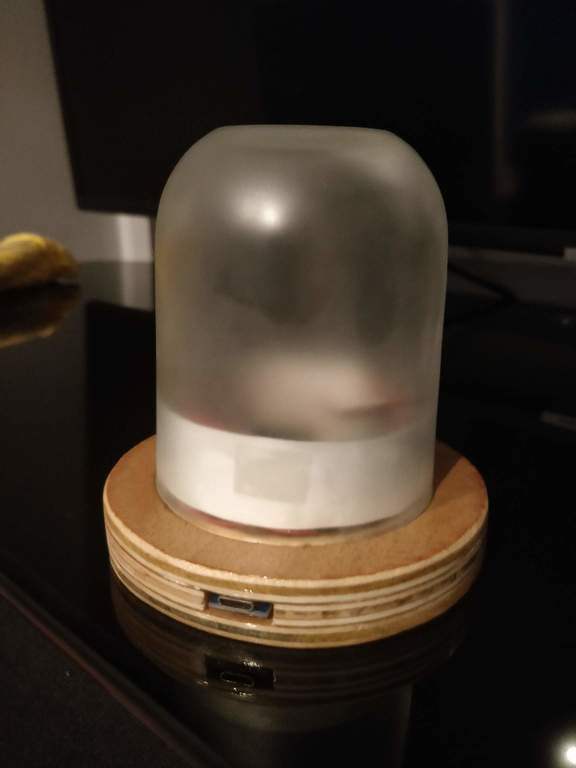
Finally happy with the electronics, I now needed to house it. The plans had always revolved around a classic Nutella glass. Some plastic spray on frosting acts as a diffuser. This works, but it needed a base. Inspiration came from this kind of glass dome the kind of thing you see in snow globes, or carriage clocks. I had some scrap 6mm and 3mm plywood around, and a Dremel circle cutter. The 6mm proved too thick, but 3 layers of 3mm proved about right, and allowed for cutting out a channel for the microSD port from the middle layer. A channel was cut in the top layer for the glass to sit in. Glue, sand and varnish.
Mounting is quite tight, but it works. The board sits on one side of the base, with the lights elevated on the other side with a few slithers of spare wood. We’ve then stuffed (where we can) the excess cable below the light level. This lets the light flow (mostly) free in to the bell.
For power control, I’ve attached a physical power switch on a micro-usb cable. It saves having to wire one in to the light.
Instructions and code are available on GitHub. I don’t plan on doing much more with this project, but you’re more than welcome to take this project, its plans, and run with it.
 There are no ads on this blog and as far as I can remember, never have been.